As promised, having put together everything I need to populate an Algolia search index, I've now managed to build out a frontend as well. I had thought about having a search box permanently accessible in the header or footer, but whilst I enjoy the quick access I also dislike most implementations. You simply can't get enough information back without resorting to modals or pop-overs or other tricks, and I wanted to avoid that. Instead, I created an entirely new page, which actually ended up working out really well with the way Algolia is configured.
The Search Component
As I use Gatsby to build my site, I needed to create a new Search component. There's nothing fancy to this, it's literally a new component folder called search within which I created a CSS module (search.module.css) and an index.js file. To get a basic search UI up and running is just a matter of importing a few pre-built components from InstantSearch, which is great. The simplest setup is:
- A search box for user input;
- A section to populate the results of that search;
- And a small component which states that the search is powered by Algolia.
That last one is a prerequisite of using their free tier and, honestly, it's a pretty fair deal. More than fair, I'd say. You get all of this functionality for free just by placing their logo somewhere on the page; you can even customise the words or logo used, it just needs to say "Algolia" somewhere and you're good to go 👍
For my purpose, that meant importing the SearchBox component for (you guessed it) the search box; the Hits component to display results; and the PoweredBy component for the attribution. By that point, my main index file looked like this:
import React from "react"
import algoliasearch from "algoliasearch/lite"
import { InstantSearch, SearchBox, Hits, PoweredBy } from "react-instantsearch-dom"
import styles from "./search.module.css"

export default function Search() {
    return (
            <InstantSearch indexName={searchIndex} searchClient={searchClient}>
            <SearchBox />
            <Hits />
            <PoweredBy />
            </InstantSearch>
    )
}
The wrapping element, InstantSearch, takes care of any background logic for the UI. However, you'll notice that it has two attributes: indexName and searchClient. These tell the Algolia library what search index to connect to, so I needed to pass in the environment variables that I set up last time[1]:
import React from "react"
import algoliasearch from "algoliasearch/lite"
import { InstantSearch, SearchBox, Hits, PoweredBy } from "react-instantsearch-dom"
import styles from "./search.module.css"

const searchClient = algoliasearch(process.env.GATSBY_ALGOLIA_APP_ID, process.env.GATSBY_ALGOLIA_SEARCH_KEY)
const searchIndex = "theAdhocracy_Feed"

export default function Search() {
    return (
            <InstantSearch indexName={searchIndex} searchClient={searchClient}>
            <SearchBox />
            <Hits />
            <PoweredBy />
            </InstantSearch>
    )
}
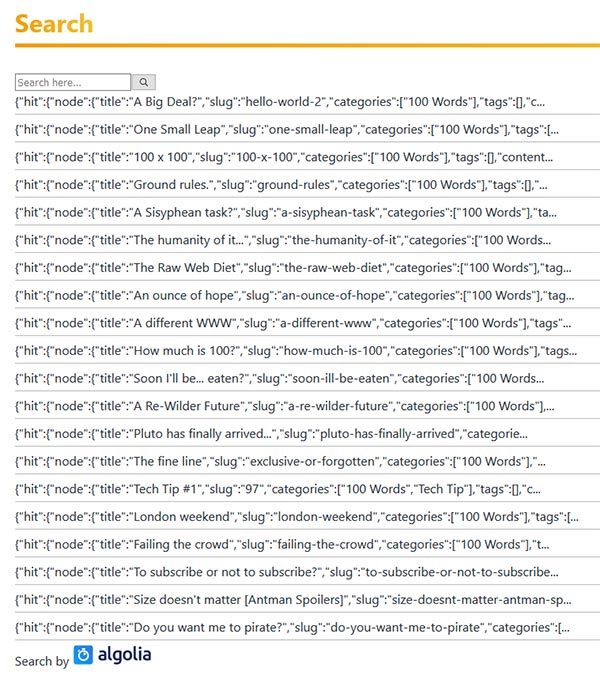
That's genuinely it. At this point, I had a new search page displaying a list of posts and a search box that would automatically filter that list when I typed into it. It's kinda magical to see. The only issue was that those results are in JSON format:
Creating Meaningful Responses
The next step was to style those search responses – what Algolia (slightly unhelpfully IMO) refers to as "hits" – and make them usable. Again, Algolia provides a pretty neat way of doing this without much additional code: the hitComponent attribute. You effectively feed in a component name and then each "hit" is styled in the way specified. That means we need to create a subcomponent; you can do that within the same file but I prefer splitting something like this out into a new file within my search folder.
Within that new file, the code is pretty much what you'd expect from a React component. A lot of the actual work is being done by the InstantSearch component in the background. Here's what mine looked like initially:
import React from "react"
import { Link } from "gatsby"
import styles from "./search.module.css"

const CustomHit = ({ hit }) => {
    return (
        <article className="content-card">
            <h2>
            {node.title}
        </h2>
        <p>
            {node.sanitised}
        </p>
        <footer>
            <Link to={`/${node.url}/${node.slug}`}>Read the full article.</Link>
                </footer>
        </article>
        )
}

export default CustomHit
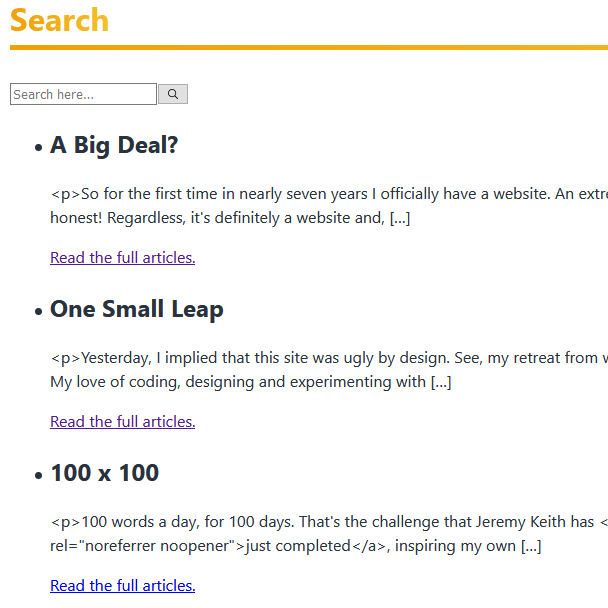
It's literally just a template for how I wanted each response to look (very roughly). Then all I had to do was connect my custom template with the Hits component like so:
<Hits hitComponent={CustomHit} />
And from that, my search was beginning to look a lot more usable[2]:
Quicky and Dirty Styling
My search was functional at this stage, so I was considering pushing it live, but I wanted to quickly tidy up a few bits of styling, specifically the bullet points. I understand why the default Hits component uses a <ul> element as a wrapper, but it didn't really suit my needs. Algolia has some specific methods for completely customising the markup used for the search UI (and I'll be writing a follow-up post on how I ultimately ended up using them), but to get this out the door I just used some simple CSS overrides.
I'm already importing a CSS Module in my main component file, so it was the work of a minute to use Firefox's dev tools to find out the current, default class names that Algolia uses and add a new rule to remove the bullets and padding:
.ais-Hits-list {
    list-style: none;
    margin: 0;
    padding: 0;
}
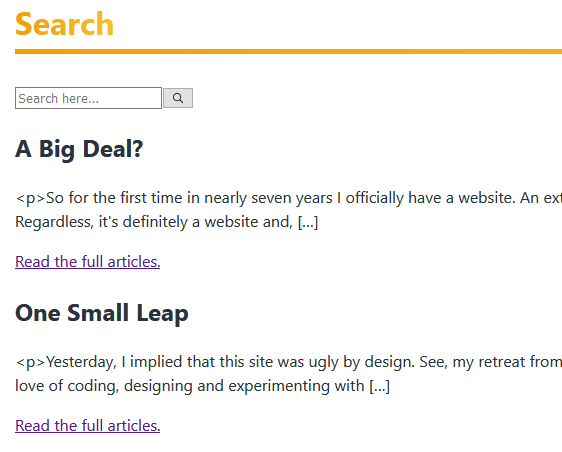
That did the job well enough, though I wouldn't be happy using it long-term. Again, I'm already writing a follow-up post which goes into my ultimate solution, but basically I try not to rely on CSS hooks which can change without my knowledge. It would be very easy for a future version of Algolia to change that class to .ais-hits-list-style, for instance, at which point my UI breaks when I run a dependency update. Not ideal, but fine for a week or so, and gets me to a useable and visually "good enough" search UI:
Keyword Highlighting
I pretty much intended to ship what I had at this point, but I'd found a really useful video tutorial (see link below) that I'd been referencing, and something they did looked so easy it just made sense to throw it in. Luckily, it genuinely was that easy, and with a few small code changes my results could highlight the searched term within the title and paragraph, like this:

That's a pretty clever piece of free UX design if you ask me and definitely worth the time it took to setup. All I had to do was import the provided Highlight component on my CustomHit template and swap out the title and summary parts like so:
import React from "react"
import { Link } from "gatsby"
import { Highlight } from "react-instantsearch-dom"
import styles from "./search.module.css"

const CustomHit = ({ hit }) => {
    return (
        <article className="content-card">
            <h2>
                <Highlight attribute="node.title" hit={hit} />
            </h2>
            <p>
                <Highlight attribute="node.sanitised" hit={hit} />
            </p>
            <footer>
                <Link to={`/${url}/${searchResult.slug}`}>Read the full article.</Link>
            </footer>
        </article>
    )
}

export default CustomHit
Incredibly simple, yet really powerful. Love it ♥
With highlighting in place, my search functionality was more than good enough. The frontend was built, it even had some small functionality enhancements, and it worked like a charm, so I set it live. Given how much I struggled to get the backend piped up, I had been a little worried about tackling the interface, but it came together in no time which speaks volumes to how well Algolia has been designed and the immensely powerful tools that they provide. Of course, there are lots of little things that I still want to do with site search here, but that's for the next post 😉