It's a bit ridiculous, but I keep losing access to the manual for our strimmer, and the instructions aren't that clear even when I do find it again. Plus, to make matters worse, there are several videos online but they all subtly disagree and I've not found one that works perfectly. Having just managed it (first try and all!) I thought it was worth recording what I did:
- Turn the strimmer off and remove the battery;
- Cut a length of strimming line (max. 8m; 5m seems to work pretty well);
- Quick aside: strimming line to use is the DeWalt 2mm thick "guaranteed tough" yellow and black range.
- Flip the strimmer over so that you're looking at the cutting side;
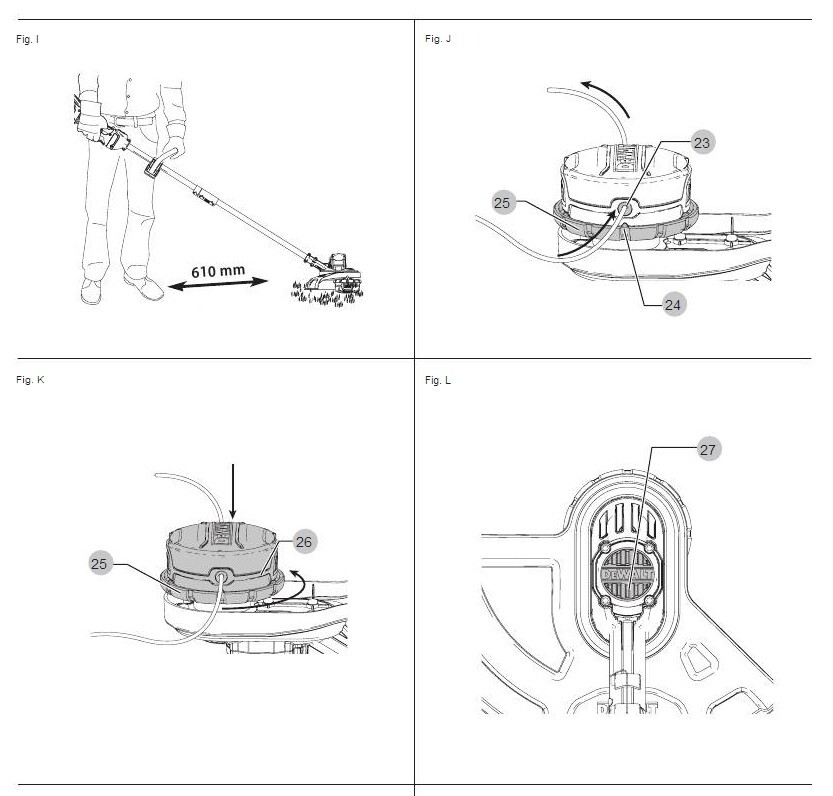
- Align the spool housing (the black, circular, DeWalt branded rotating block on the underneath of the strimmer head) so that the holes match the plastic arrows pointing up from the base of the head;
- Thread the new cutting line through one hole and out the other side (doesn't matter which hole). Keep pulling through until there are equal lengths sticking out of each hole;
- Tip: this can be tricky, particularly with very curvy line that has been kept spooled up, so you can remove the cap by pushing the clips in on either side and popping it off. That will let you see the path the lines has to take, and poke it through with a stick or your finger.
- Tip: this can be tricky, particularly with very curvy line that has been kept spooled up, so you can remove the cap by pushing the clips in on either side and popping it off. That will let you see the path the lines has to take, and poke it through with a stick or your finger.
- Place the cap back onto the spool housing (if removed) and place one hand onto it, covering the DeWalt logo, to hold it in place;
- Rotate the ring at the base of the spool housing (#25 on Figure K) anti-clockwise to wind the line in;
- This is anti-clockwise when facing the spool head. So it should go anti-clockwise around the DeWalt logo on the cap. The mechanism will likely "click" with each rotation.
- See the images below (Figure K specifically).
- Keep going until about 12cm of line is left on either side. If one is longer than the other, cut it to make them match.
That should do it. If you power the strimmer on the line should whip round a few times and then settle. It may get caught under the spool head once or twice; if it does, you can wind a bit more in and try again. If it completely unravels, then there's either not enough line overall, or it was wound in the wrong direction.